
Black & White Dreamlands
I recently met some friends at a rather tired country estate in Oxfordshire a few months ago. We walked through the grounds before heading to the pub for lunch. It was fabulous, very old and dating back to 1635. It had some amazing gardens, which were integrated into some fabulous woodland. What struck me was that this woodland had a large amount of Ivy throughout the forest and grounds. Significantly, the ivy was interspersed with many ancient yew trees. These two additional elements are amazing for infrared photography, as there is a great rendering of their tones in black and white photography.
I hadn't taken my camera when we went for the walk, and I just knew that I needed to come back to shoot this scene without being under pressure. I'm always looking for a new angle, and although these woodlands could have looked good in colour, I just knew that black and white infrared was going to do this estate and its surrounding woodlands some justice.

Canon EOS R Infrared, Lens 16mm, 1/250th second @f8
The reason black and white infrared was going to work here was specifically to do with the Ivy, yew trees, man-made structures and the surrounding water features. For me, this combination of elements is almost like the Holy Grail for great infrared photography. In fact, infrared images can sometimes appear a bit crude, especially when it comes to landscape photography, but I knew the addition of the yew trees and ivy would transform this into an epic shoot. Hopefully, in this blog, I will show you a brilliant way to use an infrared camera to achieve remarkable results.
Firstly, let's look at the images. Once we have done this, I'll explain how it works and what equipment I use. I will also briefly explain how the images are edited. (I will do a full IR photo edit demo on my YouTube channel later this year.)

Canon EOS R Infrared, Lens 16mm 1/40th second @f8 ISO 250
There is a slight ethereal glow to the images, which really comes from the infrared rendering of the highlights. A slight Orton Effect was also applied in post-processing to enhance this.
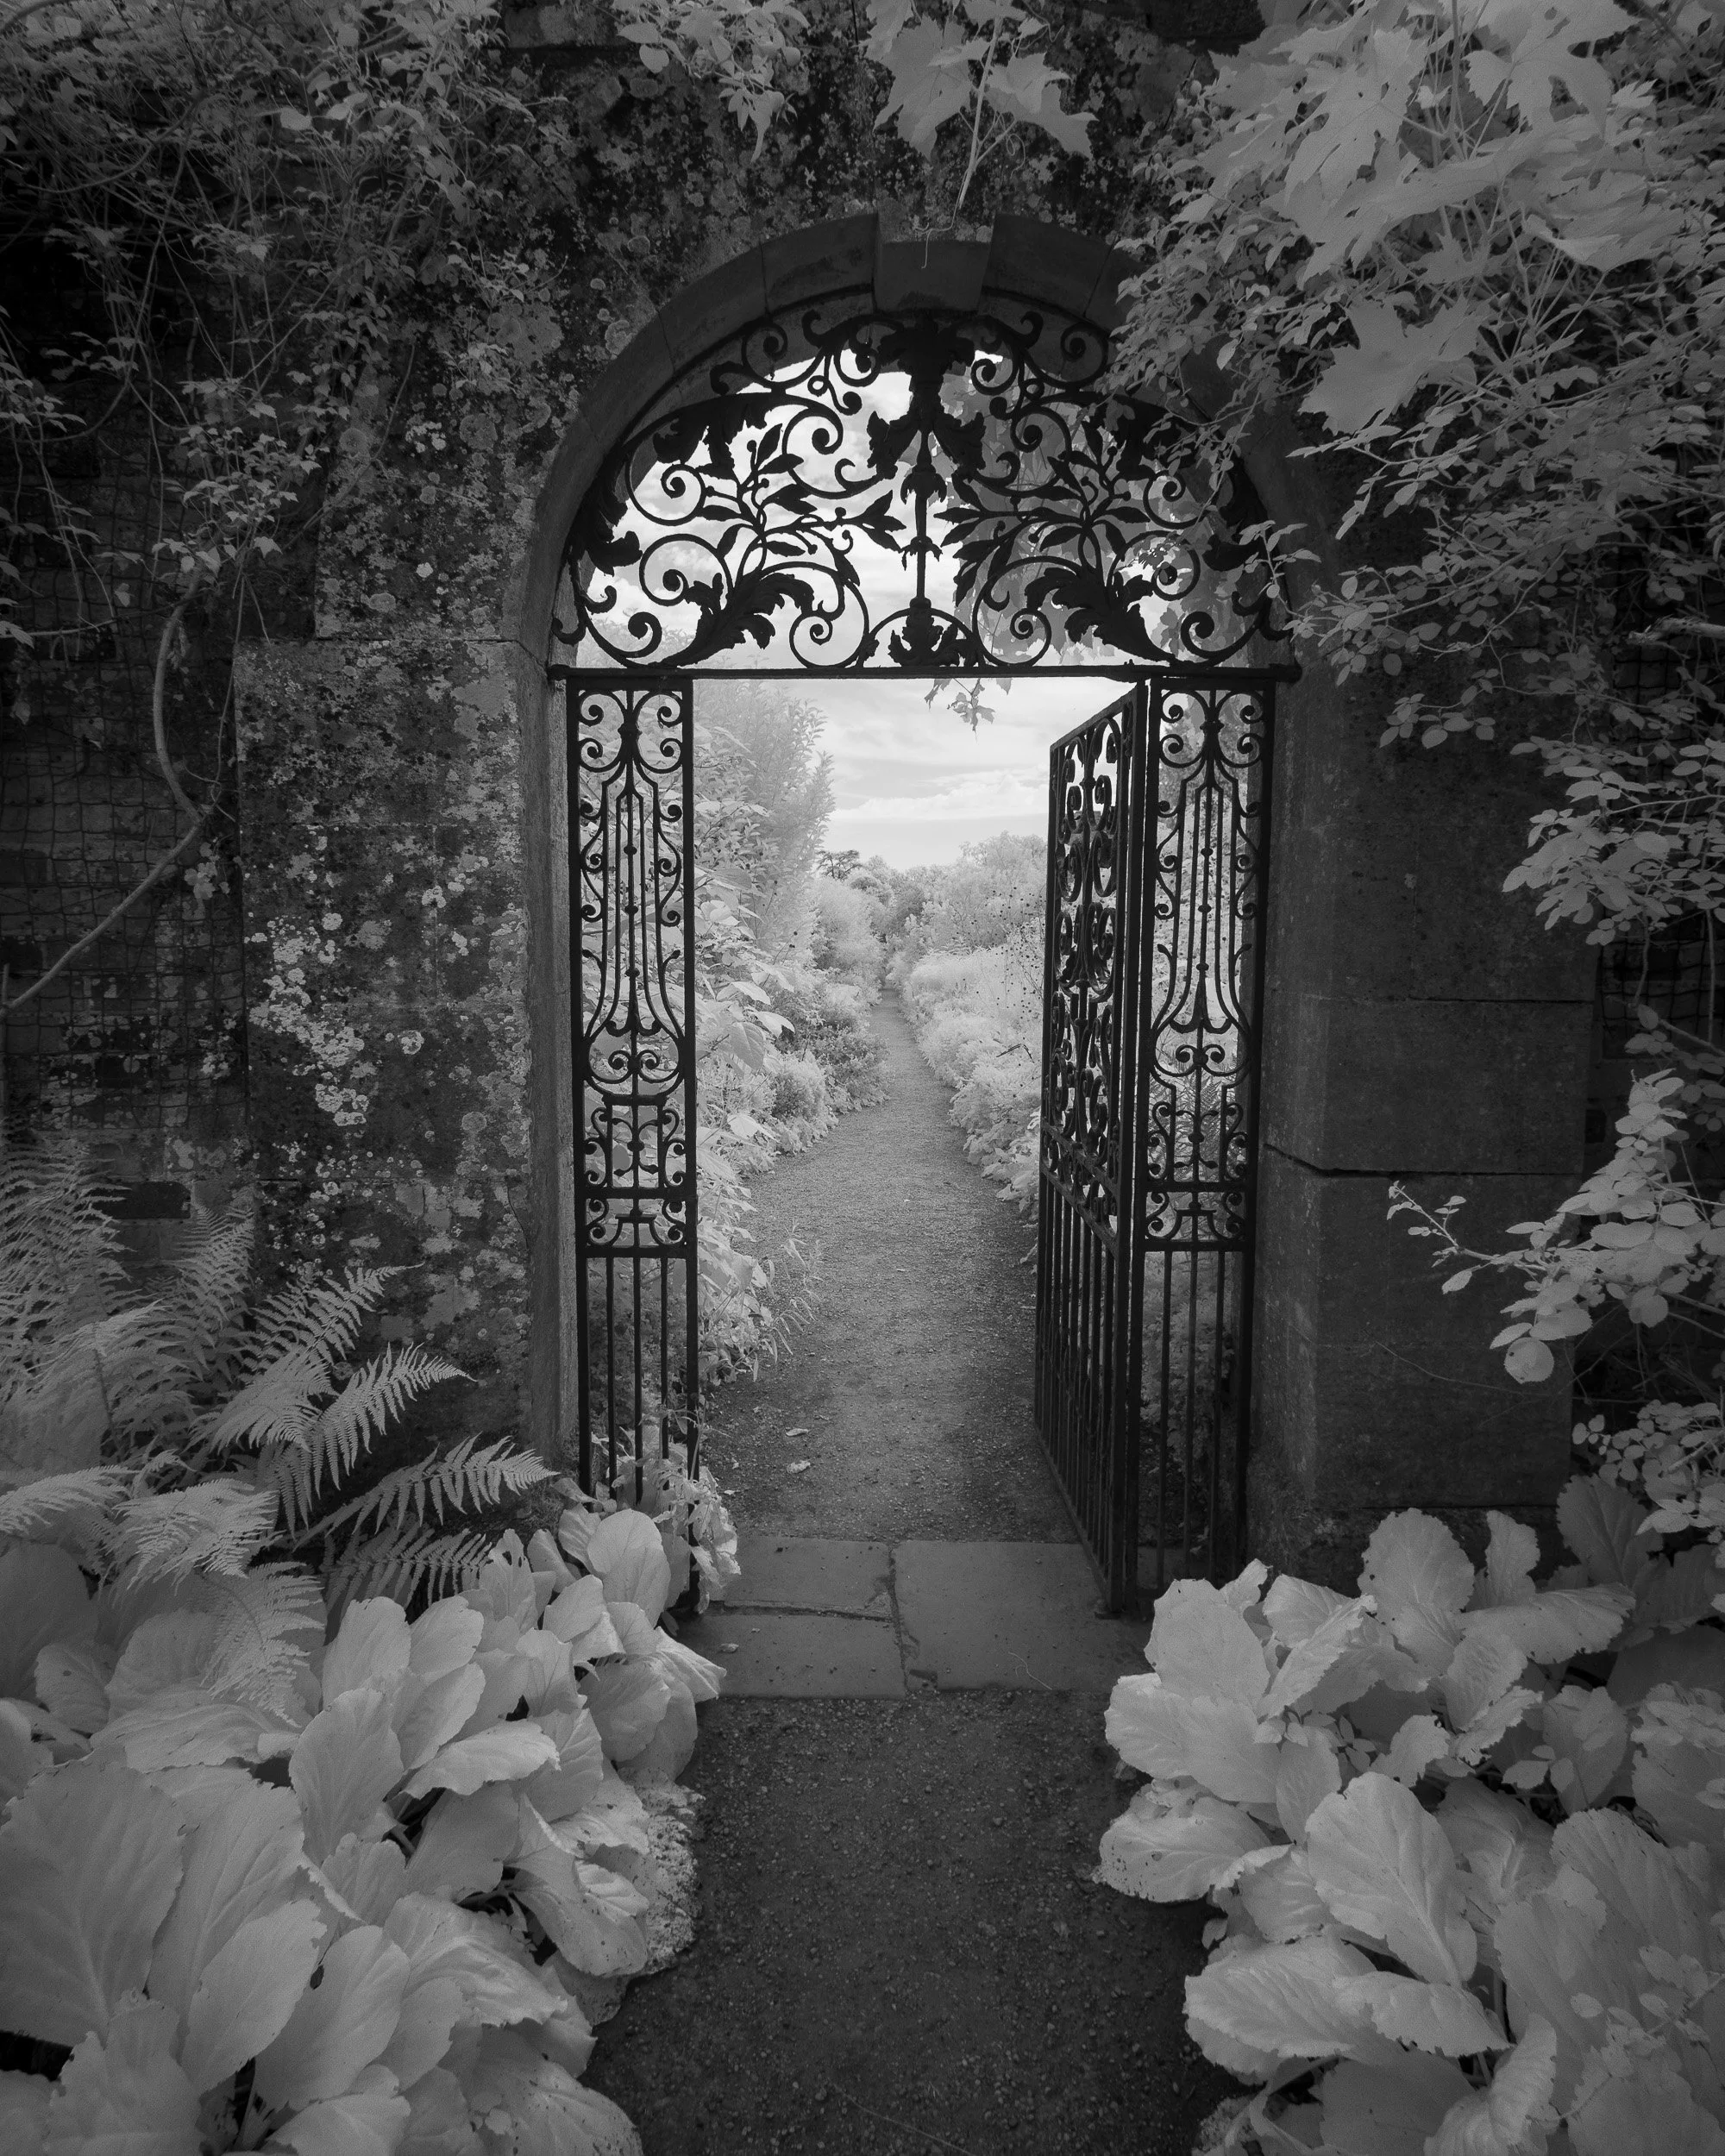
The path to the Kitchen Gardens. A secret garden feel to it?
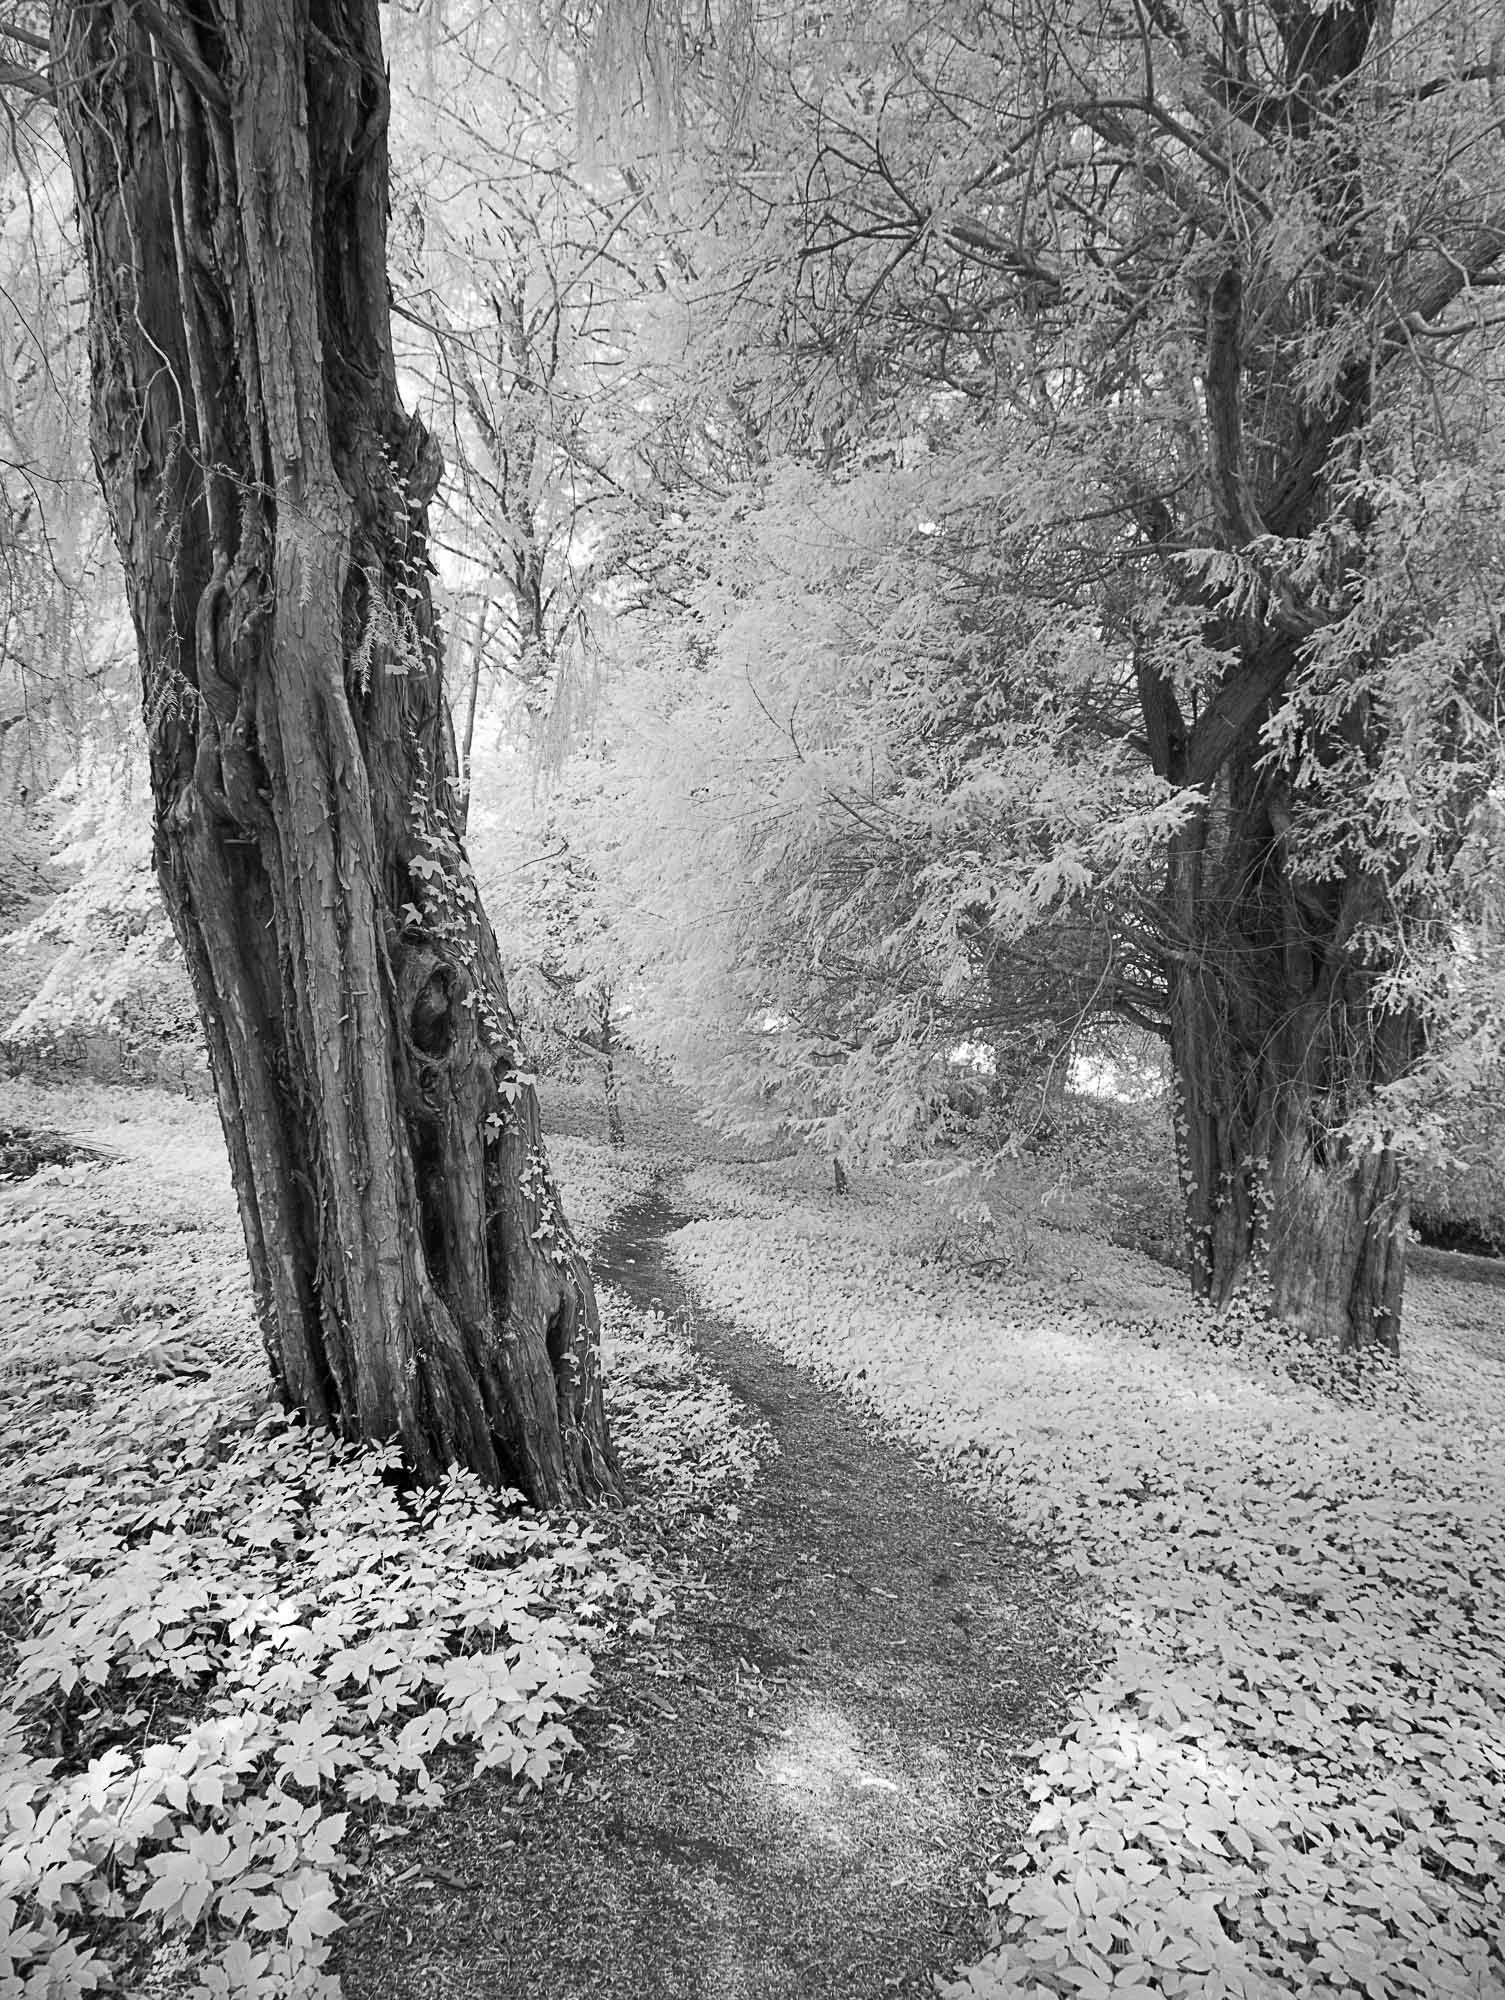
Yew tree and ivy, with a winding woodland path. Dreamy?
Infrared photography is as old as the hills and was widely used by landscape photographers throughout the film era. It has become less popular in the digital age, partly because, rather than just buying a roll of infrared film (IR), you now probably have to get your camera converted at some cost and still buy the filters.
There is a cheaper way of doing this in the digital age, and that is just to buy the filter. The problem here is that the camera already has an IR filter built into it over the sensor, so by adding another filter on top, the amount of light reaching the sensor is drastically reduced, resulting in often a very long exposure of over 15 seconds. This does not make it very practical for woodland photography, where it is darker and the shutter speeds will be even longer.

Canon EOS R Infrared, Lens 16mm 1/160th second @f8 ISO 250
Why Commit to infrared (IR)?
I really only concentrate on black and white IR. There are false colour methods, but they do not work for me. I love black and white because the rendition of IR can take woodland photography to the next level. In a world saturated by images, this alternative view of the world can be refreshing for all. I add a caveat here: to my mind, it is important to keep the viewer guessing. There are obvious IR images with white grass (green turns white in IR) covering the hills and mountains. I think this is a real turn-off. However, get into the woods, and it can be a different kettle of fish. Add some man-made structures and it really takes off.

Canon EOS R Infrared, Lens 16mm 1/160th second @f8 ISO 250
The image above has the full tones from Ansel Adams’ Zone System. This is eleven (11) tones/zones. This image has all the possible zones that can be achieved. A normal black and white image is unlikely to achieve that in these conditions. Infrared provides this increased dynamic range and tonality.
It is very handy to know why green leaves turn white and water black in IR images. This contrast between bright foliage and dark water creates the dramatic, dreamlike effect typical of infrared photography.
Why Do Green Tree Leaves Turn White?
Green foliage is rich in chlorophyll, which is highly reflective in the near-infrared spectrum (typically 700–900nm). This phenomenon, called the "Wood Effect" (named after IR photography pioneer Robert W. Wood), causes leaves and grass to strongly reflect infrared light, much like snow reflects visible light. Since IR photography captures reflected infrared rather than visible light, leaves and grass appear bright white in IR images. Some conifer trees do not reflect white light and appear grey or black as they have differences in their needle structure, chlorophyll content and surface properties. Most deciduous trees reflect white, while spruce and fir trees tend to appear darker because they have thicker, waxier needles. Some pine trees may appear brighter in IR, especially species with lighter-coloured, less waxy needles.

This is ivy glowing white in the forest floor and creeping up the tree. The yew tree and its leaves are unusual for IR photography, in the fact they remain dark. This makes for a compelling contrast in this scene.
Why Does Water Turn Black?

Canon EOS R Infrared, Lens 16mm 1/800th second @f8
It is worth understanding as a compelling component of IR B&W images. Water absorbs most infrared light rather than reflecting it. Since IR cameras rely on reflected IR light to form an image, areas with water appear dark or black because very little infrared light is bouncing back into the lens. The smoother and deeper the water, the darker it will look, as there are fewer disturbances to reflect any IR light.
Personally, I think this image is not that fantastic, but it is a good example of what to expect. Excuse the pun, but it might float someone’s boat, but not mine. However, sometimes it can look amazing (see my paddleboard trip blog)
Forest puddles are not really going to go that beautiful, deep black tone because they are physically so shallow. The same issue applies to bubbling brooks and streams where the water is moving. However, find a deep pond or river, and you are in luck. The IR rays are absorbed into the depths, resulting in a deep black tone.
I frequently use a paddleboard to navigate the wooded backwaters of the River Thames to find these deep black and white tones.
When and How to Shoot IR:
This is simple. Bright sunlight, normally the enemy of woodland photography, is the best time to shoot woodland. This has the benefit of extending your photographic day. Imagine travelling a long way and being presented with clear blue skies all day. You may be able to shoot early morning and late evening, but many will put the camera in their bag for the rest of the day. Having an IR camera to hand and you could be shooting all day.
The strange thing is that when looked through the viewfinder/live-view, the scene is not initially what you think it would be. A slight move to the left or right can make a significant difference. This is often due to the amount of light penetration in the forest and the angle of the sun.
If you shoot with your back to the sun, the visible sky will be very dark. This is good as the trees below are not distracted by the sky. Turn into the sun, and there will be significant flare; however, this can also be a bonus when shooting back lit leaves.
When the sun is low but bright, the IR image will accentuate the shadow lines from the trees along the forest floor. Be careful it is not your shadow. (A good trick is to position your own shadow within a tree shadow.)

Infrared in Black and White can really enhance the architectural elements within an image. I regularly carry this camera in London.
What Equipment Do I Need?
If you want a quick, cheap go at this, you just need to buy a Hoya IR72 filter, take your tripod out, and find a location. A good starting point is a river with willow trees touching the water. Often these are more open areas with more light. Place the camera into Manual Mode. Start with an aperture of f11 and a speed of about 20 seconds. ISO should be about 800 to 1600. Then view in live-view and adjust the exposure to suit you. Try and get your back to the sun.
If you are interested in doing this properly with the benefit of being able to handhold the camera, this is what you need to know:
The camera needs to be modified. My camera is a mirrorless camera and so has significant benefits.
• I can see the real-time exposure through the viewfinder.
• The focus on a mirrorless camera does not need to be adjusted. The focus on a DSLR is more problematic as it needs to be offset because IR waves focus on a different plane than UV light.
• I can fit IR filters inside the camera body between the lens and the sensor, but a front lens screw filter is OK as well.
If you want to modify a camera, you need to decide what type of modification you want. Essentially decide between full spectrum or IR only. Full spectrum allows me to use another filter to switch the camera back to a colour camera, and I can vary the type of IR filter to give different black and white effects.
Next, the type of filter is important:
Remember we discussed that green foliage is rich in chlorophyll, which is highly reflective in the near-infrared spectrum (typically 700–900nm). Well, the figure is important because the further up the spectrum you go with a filter, the more contrasty the image will look in black and white. These have a very rich, deep black and white feel.
The IR72 filter covers 720nm range. If your camera has been modified and had the IR-UV cut filter removed as the modification; then just replace the filter with a 720nm filter. Initially the image will result in its IR form and look very red and garish. Now set the camera to monochrome (most cameras allow this). You will now get a great black and white infrared image in your view finder. This 720nm filter is a good starting point and probably the most versatile filter because post-processing software is so good when combined with a RAW file that you can really push those blacks and whites to make a compelling image. I use a 720nm filter, but you can get variations from 630nm to 850nm. The 850nm gives even deeper blacks and contrast.
Before I set the camera to monochrome rather than standard view, I take a test shot of green grass (18% grey). This image is used to set the custom white balance, so you will get a better exposure. You only need to do this once and then set the view to monochrome. Don’t forget to set the camera to save as RAW. (JPEG can be used but then what you see is what you get and this limits your dynamic range).
Now the lens choice needs to be made. IR photography has an inherent problem with what are known as hot-spots. Most lenses produce a lighter glow at the centre of the image at a high f-stop of, say, f13 or more. Many lenses produce this spot at even lower f-stops. As a landscape photographer, this is a problem because we work with high f-stop values of f13 or above. (All these images on the blog have been shot at F8 to prevent hotspots from occurring, even though my ideal aperture would have been f13)

Canon EOS R Infrared, Lens 16mm 1/200th second @f8 ISO 200

You cannot go wrong with a church yard and B&W IR!
I hope you enjoyed the insight into this slightly niche genre of photography. Don’t forget that I have an ebook on woodland photography, which describes this and many other techniques to shoot woodlands (see the link below).
Here are some links you may be interested in:

Canon EOS R Infrared, Lens 16mm 1/250th second @f8 ISO 200
And finally, in relation to editing the images after shooting them in the RAW format. I will post a video for this in future on my YouTube Channel
In the meantime, here is a brief description of the process for Adobe Lightroom Classic:
When editing infrared (IR) images in Lightroom, the first important step is to apply a custom DNG profile.
Download the Adobe DNG Profile Editor (free, but no longer officially updated by Adobe. You can still find it from Adobe’s legacy downloads page). You can still get away without using this if you are in B&W, but it helps.
Because infrared-converted cameras record light beyond the visible spectrum, Lightroom’s standard camera profiles can produce very strong red casts that are difficult to control with normal white balance sliders. A custom infrared DNG profile expands the available white balance range, allowing you to neutralise the red channel and achieve a workable starting point for editing. This is especially important if you plan to explore colour IR processing, as it gives you the flexibility to adjust hues and perform channel swaps later.
For black & white infrared editing, once the DNG profile is applied and the white balance corrected, you can convert the image directly to monochrome using Lightroom’s Black & White treatment. Unlike colour infrared, where you may want to perform channel swaps or enhance surreal false colours, the black & white approach emphasises the unique tonal qualities of IR photography: glowing foliage, dramatic skies, and strong contrast. From here, the editing process is similar to standard B&W work by adjusting contrast, highlights, shadows, clarity, and texture. The tonal separation will often feel more extreme than visible-light black & white. This makes IR B&W editing more about refining those dramatic contrasts, rather than balancing or enhancing colour relationships as in a colour workflow.
Enjoy the rabbit hole of IR!